Sights Attached To The Plane
Description
This section is from the book "Airplane Photography", by Herbert E. Ives. Also available from Amazon: Airplane photography.
Sights Attached To The Plane
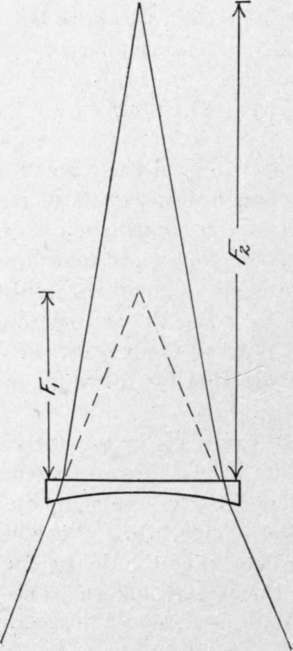
Any of the sights just described can be attached to cameras fixed in the plane, but they would be useless in the positions ordinarily occupied by the camera. It has therefore become common practice to attach the camera sight to some accessible part of the plane. The most primitive method of sighting is merely to look downward over the side—a method in general use to the very end of the Great War. One step in advance of this is to mark a large inverted V on the side, with its vertex at a point where the observer can place his eye and so see the fore and aft extension of the field of view covered by the camera. This kind of sight was common on the French "photo" planes. On some of the English planes the tube sight was carried on the outside of the cockpit. Any of the sights described can be carried on the inside of the fuselage, provided a hole is cut in the floor. For satisfactory sighting a hole in the floor is really necessary, as it enables the terrain on both sides of the vertical to be seen. One drawback to the simple hole, however, is that it cannot be made large enough to show the whole field from the ordinary height of the observer's eye, thus forcing him to bring his head down near the floor. This difficulty is gotton over in a very beautiful way by the use of the negative lens sight shown diagrammatically in Fig. 71.

Fig. 71. - Diagram of negative lens sight.
Let Fi be the distance at which the edge of the hole (or a rectangle marked on the lens) appears the size of the camera field (if the hole is the size of the plate, Fi is the focal length of the camera lens). Let F2 be the distance from the floor to the observer's eye. What is desired is a concave lens which will diverge the rays from their normal meeting point at F1 to a new meeting point, F2. The focal length of lens required is given at once by the simple lens formula—

Thus if Fi is 12 inches, and F2 is 36 inches, F will be 18 inches. The lens is to be marked with a rectangle showing the shape and size of the camera field, and a central mark such as a cross. An upper rectangle, or a bead, or a pair of cross wires a few inches below the lens, may be used for the other sight. For precision work the sight above or below the lens should be adjustable in position, especially where the camera suspension permits the camera to be adjusted for the angle of incidence of the plane.
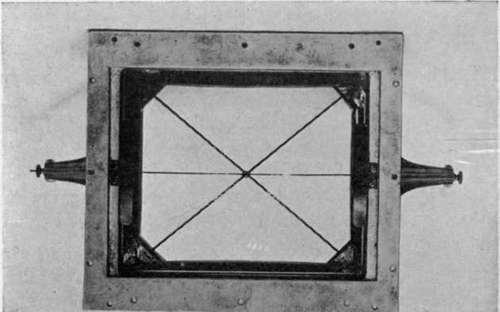
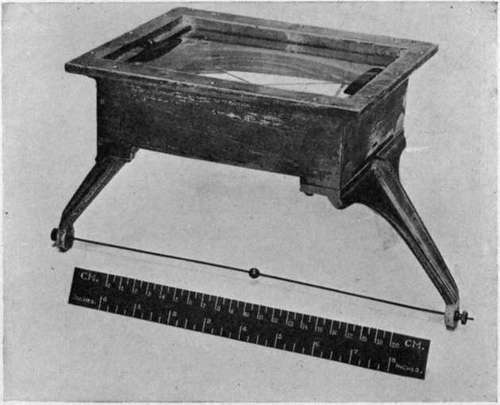
A negative lens sight should be placed in the observer's cockpit, if he takes the pictures, and also in the forward cockpit, so that the pilot may be accurately guided in his part of the task. In addition, it is advisable to place a negative lens well forward in the pilot's cockpit, to enable him to see the country some distance ahead. The lenses should be planoconcave with the flat side upward; otherwise, all the loose dirt in the airplane settles in the middle of the concave depression. A negative lens sight in a metal frame forming a completely self-contained unit ready for mounting in the plane is shown in Figs. 72 and 73.

Fig. 72. - Negative lens and mount, viewed from above.

Fig. 73. - Negative lens and mount, side view.
Continue to:
Tags
camera, lens, airplane, aerial, film, exposure, photography, maps, birdseye
